Thursday, December 22, 2016

Sparkly Holiday Card

Happy Holidays!  I created this card using the foil technique that I've recently being playing with.  I'm also submitting this creation at Simon Says Wednesday Challenge - Make It Sparkle this week.


I started with a piece of silver foil and swiped it with black Staz On ink.  I then took SU's birch embossing folder and tapped Versamark ink on the inside of the folder.  Place the foil inside the embossing folder and run through your die machine.  I removed the foil and sprinkled with white glitter embossing powder.  The bird and deer dies are from Memory Box cut from glitter card stock.  The entire piece was then mounted to red card stock from The Paper Cut.  

This is a fun technique to play around with and will be sharing this technique with our stamp club next month.


Saturday, December 17, 2016

Christmas Gifts

Very snowy morning in Wisconsin but beautiful and very Christmasy looking!  Today I'm sharing a project I made for the ladies in my canasta club.  I will also be sharing this project at Simon Says Wednesday Challenge - Gift It.

I started with a 9"x5" piece of red card stock.  The deer die is from Spellbinders.


I made two scores near the center of the card stock to accommodate the trimmed legal pad.  The ribbon was attached on the inside prior to adhering the designer paper and note pad.  I covered the header of the note pad with the same designer paper.  The purchased coin envelope holds a gift card or, in this case, postage stamps.


Then I also created boxes for my gifts!  I purchased the Big Score from Crafter's Companion and it is the most awesome tool for making boxes of all sizes plus other paper crafting ideas.  I used all Bo Bunny card stock for the boxes and various die cuts to decorate the tops.  The dies are from Tim Holtz (Sizzix), Memory Box, and Tonic.  The deer head is a chip board piece and I used the Magic Melt technique from Stampendous.


Sunday, November 27, 2016

Foil Christmas Card

Sharing another Christmas card I created for our stamp club exchange and I will also be sharing this at Simon Says Wednesday Challenge "Christmas To Die For".


The die is from Memory Box and foiled using the Minc from Heidi Swapp....thanks to my friend, Pat!  We recently had a play date and had fun creating foiled images from die cuts.  The sentiment is a stamp from Penny Black.  The silver glitter paper and black card stock are from The Paper Cut.  The embossed background is an embossing folder from Tim Holtz's collection.  More Christmas goodies to share later!


Tuesday, November 22, 2016

Stamp Club Exchange

Here's one of the cards I have created for our annual stamp club exchange next month.  I am also entering it in the Simon Says Monday challenge.


The two dies are from Penny Black and are sold as a set.  The background die has several trees and the foreground die has a larger tree along with the forest critters.  The sentiment is from Tim Holtz (Sizzix) and the inks are Distress inks.  

I began by creating a 2-1/2" square water colored with Distress markers onto water color paper.  I adhered the background die onto this water color piece.  I then used Spellbinder's Nestability squares to create a frame which I adhered with foam tape.  Lastly, I glued the foreground die around the edges and attached to the frame which adds a 3D effect to the image.  I water colored some additional  card scraps with the same Distress inks and die cut with Tim's holiday sentiments.  Glitter was also added to the forest scene prior to adhering to the card front.  


Friday, November 18, 2016

Happy Thanksgiving!

Here's the Thanksgiving card I created for a few friends.  I will be submitting this card to Simon Says Monday Challenge.


The image is from Impression Obsession and colored with Copic markers.  I added clear Wink of  Stella to parts of the butterfly and leaves but doesn't show up in the photograph.  The sun in the background was created with Distress Inks.  This was a time consuming image to color but very relaxing:)

Friday, November 11, 2016

Pretty Peacock

This card has been sitting on my desk for a year and a half!!!  Finally, getting around to posting it!  I created this card for a group of friends getting together to share ideas.


I believe this technique should be available on-line at Stampendous since it is a metal stencil technique.  I applied matte black embossing paste over the stencil.  Once dry, place the stencil back on top of the image and tap a glue pad over the entire image.  Then start tapping various colors of Pearl Ex or other similar product with a stencil brush over the image and let dry.  I'm sure I did an awful job of explaining the technique but an internet search should come up with a much better explanation.

Tuesday, November 8, 2016

November Stamp Club Challenge

Another Christmas card design done!  I will be entering this card in the Simon Says Monday challenge this week.


This is the sketch one of our members provided for this month.  Most of the card is Tim Holtz...Coordinations paper, die sentiment, tattered poinsettia, distress inks and poinsettia embossing folder....and distressed the edges with his distress tool and sand paper tool!  Tim always inspires me!  The kraft paper is from SU.  To add bling to the card, I added  gold Wink of Stella brushed onto the poinsettias embossing folder.  I used fired brick and vintage photo distress inks on the edges.  Otherwise, the card is pretty self-explanatory.  

Saturday, November 5, 2016

Foil Technique

Here are two more foil technique cards I created.  I am unable to locate colored metal anywhere!  These two colors, at one time, were available from Spellbinders but they appear to be out of stock.  I believe they sold this metal for jewelry making.  I also like using this heavier metal with alcohol inks.  I was able to purchase 38 gauge metal from Dick Blick but only in silver, copper and bronze.


On the purple metal, I did not add any Staz-On ink.  I inked the snowflake embossing folder with Versamark ink and ran through my Vagabond.  Then white/glitter embossing powder was added and heat set.  The snowflake die is cut from white glitter paper.


I did add dark blue Staz-On ink to the blue metal prior to running through my Vagabond and the Versamarked embossing folder.  Looking forward to playing more with this fun technique!

Monday, October 31, 2016

Happy Halloween My Friends!

I love my Distress Inks from Ranger (Tim Holtz) and I used chipped sapphire, dusty concord, scattered straw, persimmon, hickory smoke and vintage photo.  I blended the colors with the round blending tool also from Ranger.  I created several of these cards for friends:)


The image is from Inkadinkado and stamped in black archival ink on water color paper.  After the distress inks are applied, I misted water over the entire image to create specks since the water reacts nicely with distress inks.  

Have a safe and Happy Halloween!

Tuesday, October 25, 2016

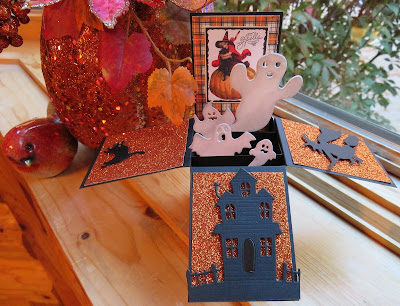
Halloween Box Cards

More Halloween box cards for my grandchildren!  These are so much fun to create!  I'm also entering these cards into Scrapy Land's blog challenge for Halloween.


I used various dies and stickers from Little B, Elizabeth Crafts, Recollections, Spellbinders and a Martha Stewart punch.  The designer paper is from Authentique.


The glitter paper is from Stampin' Up.  Happy Halloween!


Saturday, October 22, 2016

Happy Halloween and Simon Says Blog Challenge

Love making Halloween goodie bags/boxes for my grandchildren!


This is a box card I created putting a bottom on this box card which doesn't show in the photograph and I will tuck some money in there for my kiddos:)  I will also be submitting this box card to Simon Says Monday Challenge.    The dies are from Little B, Memory Box and Impression Obsession.  The orange glitter paper is from Stampin' Up.  The designer paper is from Authentique and the box card itself is from the Paper Cut.

Tuesday, October 18, 2016

Embossed Foil Technique

Here's another embossed foil card.  I rubbed brown Staz-On ink onto copper foil.  Then I applied Versamark ink onto a leaves embossing folder and placed the foil in the folder and ran through my Vagabond die cutting machine.


I then applied Stampamania copper embossing glitter onto the foil and heat set.  If you have too much embossing powder on your foil, you can always brush off some of the embossing powder prior to heat setting.  The cork paper leaves I happen to find in my stash and embossed the edges with the copper embossing glitter.  I edged the brown card stock with a copper leaf foil pen.  A fun technique and more to come!

Sunday, October 16, 2016

Foil Technique

I recently saw this technique on-line and fell in love with it and had to give it a try. 


I changed the technique up a bit by using foil instead of aluminum-wrapped card stock.  Black Staz-On ink is applied to the foil (direct-to-paper technique or in this case, direct-to-foil).  Then Versamark ink is rubbed on the inside of an embossing folder and the foil is embossed.  You then sprinkle gold embossing powder onto the foil and heat set.  I came back with brown Staz-On ink and applied with a sponge onto the clock faces.  All elements of this card are Tim Holtz products except the watch face which is from Bo Bunny.  

A very fun technique and I will add some other samples in future posts.

Thursday, October 13, 2016

Tonic Fanatics and Stamp Club Challenge

I created this card for our October stamp club sketch challenge.  I had to use all glittery card stock, of course (because I loved it!), so the card does not show well in a photograph.


The main image die is from Tonic Studio's Rococo line called Luna.  The inside (forgot to take pic) has a Tonic happy birthday die cut from silver glitter paper.  Got a little carried away with the glitter paper but couldn't resist.

I have other creations waiting in the wings so will start posting again:)

Friday, September 2, 2016

September Stamp Club Challenge

I really like the sketch challenge that Marie provided for our group and we had to incorporate butterflies and dry embossed background.


My new Memory Box die was perfect for this challenge and it is called Butterfly Tryptych.  The background behind the butterfly die cuts is new paper from Ken Oliver.  The embossing folder is one of Cuttlebug's originals and one of my favorites.  Have a great holiday weekend!

Sunday, August 14, 2016

Sun Print Note Cards

I've been having fun creating this set of note cards!  The idea was taken from an article written by Deborah Nolan in the summer 2016 issue of CardMaker magazine.  Cyanotype paper was used to create these fun sun prints from die cuts and printed acetate sheets.


Here is the set of five together.  To complement the cyanotype paper, I used gold and dark pink card stock.  Deborah also used these colors in her article and I really liked the combination.


In the above two cards, I used die cuts from Memory Box to create the sun prints.  I did these very simply by layering the following:  piece of card board, cyanotype paper, die cut, clear acrylic sheet and placed in the sun for just a few minutes.  (Both days were bright, sunny days so the "printing" didn't take long.)  The paper goes from deep blue to pale blue as the sun is doing it's magic with the paper.  You then rinse the paper for a minute and set on paper towels to dry.  As it dries, the paper once again turns dark blue, leaving the print a light blue.  Fun to watch the magic happen!  

My granddaughters and I also created sun prints when they were visiting.  A fun craft for all ages!


These two cards were created using preprinted acetate images.  Same method of sun printing as done above.  The same sentiment die was used on all cards and is from Spellbinders.  

I purchased the cyanotype paper from Amazon (TedcoToys).  Thinking I might have to buy another pack of this paper to create some winter cards.....

Monday, August 1, 2016

August Stamp Club Challenge


Karen provided our sketch this month and here is my interpretation.  We had a play date recently and I created the heart using the Melt Magic technique with Stampendous's embossing powders and fragments.


Since I used metallics on the heart, I decided to use glitter papers on the card itself.  The border punch is from EK Success.  Lots of shine going on!

Thursday, July 28, 2016

Glitter Technique

I've recently taken a couple of glitter technique classes at Let's Create in Wisconsin Rapids as refreshers so thought I'd better play quickly before I forgot what I had learned...again!  I'm also entering this tag in Simon Says Blog's Wednesday Challenge - Anything Goes.


The main image is a sticker from Elizabeth Craft Designs.  I placed Sookwang tape onto white card stock the size of the sticker.  The next step is to cut out the sticker and place onto transfer tape.  The image is then transferred to the Sookwang tape.  The glitter used on the image is from Glitter Ritz.  The image was then colored with Copics.  I added bling to the images belt and shoes.  I also added a large bling flourish to the background.  The designer paper is from Bo Bunny and distressed with tea dye distress ink and adhered to a large tag.

Wednesday, July 27, 2016

July Stamp Club Challenge

Once again, I followed the challenge provided by Margie perfectly.  So proud of myself!  We were not to use any dies on the challenge.  Hard not to do since dies are sooo popular now!


The images are from Stamplistic and stamped in cocoa pigment ink and then clear embossed.  The images were colored with Distress markers and mounted onto brown card stock.  Added some pearls and distressed designer paper.  

Thursday, June 9, 2016

New Pigment Powders For Me!

Had some fun playing with powdered pigments from Lindy's Stamp Gang.


Lindy's Stamp Gang calls them Magical Powders.  They come in sets of various color combinations.  This is the Autumn Leaves combination.  They are very similar to Perfect Pearls as far as I can tell but haven't done other techniques with them yet so will hold back on further comparisons.  They do have glimmer built into the colors which is way fun!

The butterfly die image is from Penny Black and the sentiment is from Hero Arts.  I embossed the piece on the left with one of We R Memory Keepers new embossing folders.  The embossing does not show up well in the photo.  


Tuesday, June 7, 2016

June Stamp Club Challenge


Barbara provided these adorable images for our group to create a card.  Each image was different and I don't know the name of the company, unfortunately.  I do know that Let's Create in Wisconsin Rapids sells these images.


I colored the image with Copics and mounted on various card stocks along with the ribbon I purchased from The Lighthouse in Wisconsin Rapids.  The lady bug dimensional stickers are from Little B.  Aren't they too cute!  I love Little B stickers!

Saturday, June 4, 2016

Stamp Club's June Shoe Box

Found out how difficult it is to photograph an acetate card!  I created this card for this month's stamp club shoe box.  I subscribed to a recent On-Line Card Class called Clear and Sheer and this is my interpretation of one of the cards presented.


I started with heavy weight acetate and trimmed it to A2 size.  I embossed the front of the acetate card with a Cuttlebug star embossing folder.  I then cut four stars from Spellbinder's Star Nestabilities.  I placed one smaller light yellow star on the front, another larger yellow star behind it on the inside front and then two equal size white stars on the inside and back of the acetate card.  You now have room to stamp or write a sentiment and stamp/write your initials on the back.  The front die sentiment, Make A Wish, is from Penny Black and cut from blue glitter card stock.  Hope our group enjoys making the card as much as I did creating it.

Friday, June 3, 2016

Best New Stamper/RubberStampMadness!

It's time for me to pat my own back!  I was chosen as the best new stamper in the current issue of RubberStampMadness magazine.  Not that I'm a new stamper (far from it) but that it was the first time I have submitted artwork to this magazine.

Of course, my inspiration is from Tim Holtz and his monthly tags.  I spread various colors of Distress Inks onto a craft sheet, spritzed with water and dragged the tag through the inks until I was satisfied with the results and dried with a heat tool.  I stamped Tim's airplane stamp in black archival ink as well as Dyan Reaveley's sentiment and the angel from Endless Creations.  The ephemera along the bottom of the tag is also from Tim Holtz.  Working on tags is very fun and I need to experiment more with them.  I have to thank my friend, Pat, for her encouragement to submit my artwork to RSM!  Thanks, Pat!


Saturday, May 14, 2016

Niece's Wedding Card

My great niece, Nadia, is marrying next month and I wanted to create an elegant card for her and her husband-to-be, Josh.


The heart die cut is from Stampin' Up and unsure of the company the sentiment die is from since I borrowed it from a friend.  The white card base is 5x7 and the die cut is mounted over gold mirror card stock.  The flowers and sentiment were cut from gold glitter paper.  Added a little bling to the center of the flowers and it's done.  Fairly clean and simple card but elegant for a wedding.


Friday, May 13, 2016

Stamp Club Challenge

Jayne, a member of our stamp club, provided cut outs from K & Company to challenge us to create a card for our May meeting.


I selected several smaller cut outs so I could create an A2-size box card.  The designer paper is from Graphic 45.  Always fun to see the different ideas created by members of our group.

Monday, April 11, 2016

Happy Birthday!

I created this card for my friend, Karen, on her special "social security" birthday!


I will be submitting this card at Simon Says Wednesday Challenge.  Simon Says is celebrating their 7th birthday so thought this card appropriate for their special occasion, too.

The main image is a die from Dreamweavers/Stampendous called tree line.  The die is cut from white 100# card stock.  The die was then placed on a heated griddle/craft sheet and sprinkled with seasoned spice and teal embossing powders from Stampendous.  When the powders are completely melted, the die cut piece is removed from the griddle and placed on a craft sheet to cool.  The melt art was then mounted to teal paper and a white folded 5x7 card.  The sentiment is from Endless Creations.

Happy birthday to Karen......and Simon Says!


Thursday, March 3, 2016

Magenta Stencils and Nuance

A few months ago, I received these beautiful Magenta stencils from Craft Stamper Magazine's challenge of the month.  I knew I wanted to use Magenta's Nuance pigment powders along with their stencils so waited until I could order the full set.  Well......I finally was able to place an order and the colors are beautiful!  


I placed the stencil on water color paper in both instances and then sprinkled the Nuance colors and then spritzed with water until I was satisfied with the color saturation.  On the card above, I added Viva Decor's 3D Stamp Paint on one of the flowers and then added their Pearl Pen to the centers of all the flowers.


On this card, I placed the stencil off the water color paper but used the same method mentioned above.  I just added a sentiment (custom-made stamp) and bling.  

These stencils are poinsettias but I wanted to create something other than holiday themed this time of the year so I used other Nuance colors that didn't necessarily represent poinsettias.  Thank you again, Magenta and Craft Stamper Magazine for the gift of stencils and look forward to creating holiday cards later this year.

Wednesday, February 24, 2016

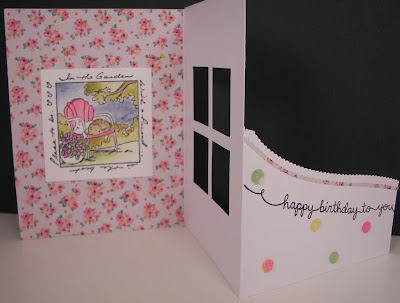
March Stamp Club Challenge

My fellow club member, Gail, gave our group a tri-fold window card as our challenge.  At first, it stumped me since the window was on the middle panel....hmm.  I knew I wanted to use a new Art Impressions stamp I bought at the Madison stamp show last November.....but how to design the remainder of the card???  I stamped the image on water color paper with black archival ink and water colored the image with Tim Holtz's new Distress Crayons.  Let me tell you, the crayons are awesome!  I colored the crayons on an acrylic block and then picked up the colors with a water brush since this was a small image.  It would have been too difficult to color with the crayons directly onto the stamped image and then move around with water.


Next, I adhered designer paper to the back panel and then adhered the water color piece.  I also added the same designer paper on the outside of the middle panel, cutting an opening for the window prior to adhering.


The front was cut with a border die from Our Daily Bread Designs (Spellbinders).  The sentiment is from Lawn Fawn.  I added sequins from Pretty Pink Posh around the sentiment.  Once I figured out how I wanted this designed, it was a piece of cake.


Monday, February 15, 2016

Happy Valentine's Birthday, Pat!

I created this card for my friend, Pat and also as a shoe box project for our stamp club.


The stamps are from Stamplistic.  I embossed the squares with black embossing powder.  Then the squares were outlined with a Quickie Glue Pen and sprinkled with glitter.  Swarovski crystals were added to bring out more sparkles.

Thursday, February 4, 2016

February Stamp Club Challenge

It was my turn to provide the sketch and theme for February.  Of course, I had to ask the club to make Valentine cards.


The heart was die cut from a larger Color Burst piece with a Spellbinder's Nestability die.  The card stock is from Stampin' Up and the designer paper is from Martha Stewart.  The sentiment is from Memory Box and the sequins are from Pretty Pink Posh.  The Japanese cording is called mizuhiki.
Tuesday, February 2, 2016

Snowy Day in the Northwoods!

An appropriate posting for our weather in Northcentral Wisconsin on Groundhogs Day!


One of my favorite stamp companies from the UK is IndigoBlu.  Sometimes hard to find to purchase in the US.   This stamp is called "Winter Wonderland".  The image was stamped with Versamark ink and embossed with green embossing powder.  The image was die cut with a Spellbinder's die then layered onto Memory Box designer paper.  I sprayed the entire front of the card with silver glitter.  Sequins and silver Wink of Stella were added to the image to enhance the snowflakes.  Most of the shiny does not show up in the photograph.

Saturday, January 30, 2016

Silent, Soft and Slow

I've been experimenting with Stampendous's Melt Media Magic technique.  Isn't it nice when your craftiness turns into something you like!  The die is from Memory Box called Flurry Snowflake Frame.


Lay the die cut on a craft mat onto a heated griddle (300 degrees) and then sprinkle Stampendous's Frantage Shabby Blue Embossing Enamel around the inside edge of the frame until it melts.  Pull off the griddle and cool.  Here is a close-up so you can see the embossing enamel.


The die cut was then mounted onto coordinating card stock.  I have some more experimenting to do!

Monday, January 18, 2016

Wintry Day

I found these screen door die cuts from Rubber Cottage at a stamp show recently along with this similar design.  I do not know the name of the company where I bought this rubber, unfortunately.  I've had it for many years.  


I inked the door with Versafine Olympia green ink.  It is very difficult to see in the photo, but it is a square card and the front is trimmed shorter on the side.


I stamped the main image with the green ink again onto a smooth card stock.  This type of card stock works much better when stamping photo stamps.  I then "painted" Nuvo glitter paste from Tonic Gold onto the trees and buildings.  This card looks much better in person than it photographed!  Once again, no sentiment until I decide what I want to do with the card.

I'm going to share this card at Artistic Stamper and Stempelgarten.


Monday, January 11, 2016

January 2016 Stamp Club Challenge

Our challenge for this month was to use the colors pink and black along with an art deco theme.


I had the perfect stamp for this challenge!  Anyone remember the bolio stamps from Judikins way back when?  Well, I own everyone she released:)  They hang on the wall in my craft room as decor but every once in a while, I use them to actually stamp!  Imagine that!  This particular bolio is called Art Deco:)  I stamped with Versmark ink onto 40# vellum and embossed with black detail embossing powder from Stampamania.  I colored the back side of the images with one of the pink Copics.  I fussy cut all three images and layered onto pink card stock and then onto a black card folded to approximately a #10 size.  A bookmark ribbon was added to the top also from Judikins.  I purposely did not stamp a sentiment until I know what I want to use this card for.  Stay warm on this very cold winter day in Central Wisconsin.